
Share a session with photos and video
Add photos and videos to a session, make a post with your numbers and route, and cut camera footage together in Video Studio.
Updated 4 November 2026
Every session has a Media tab for the photos and videos you took on the day. From there you can make a post for social media: your photo or video with the session’s name, numbers and route on top, ready to download or share. Rides and runs can also be cut together with your camera footage in Video Studio. This article covers adding media, making a post, and the two video tools.
Where to find it
Add photos, then share
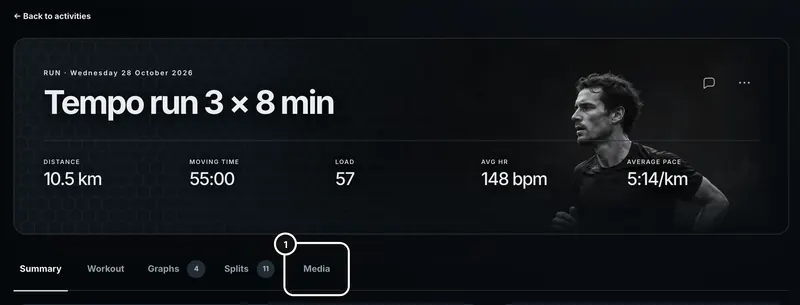
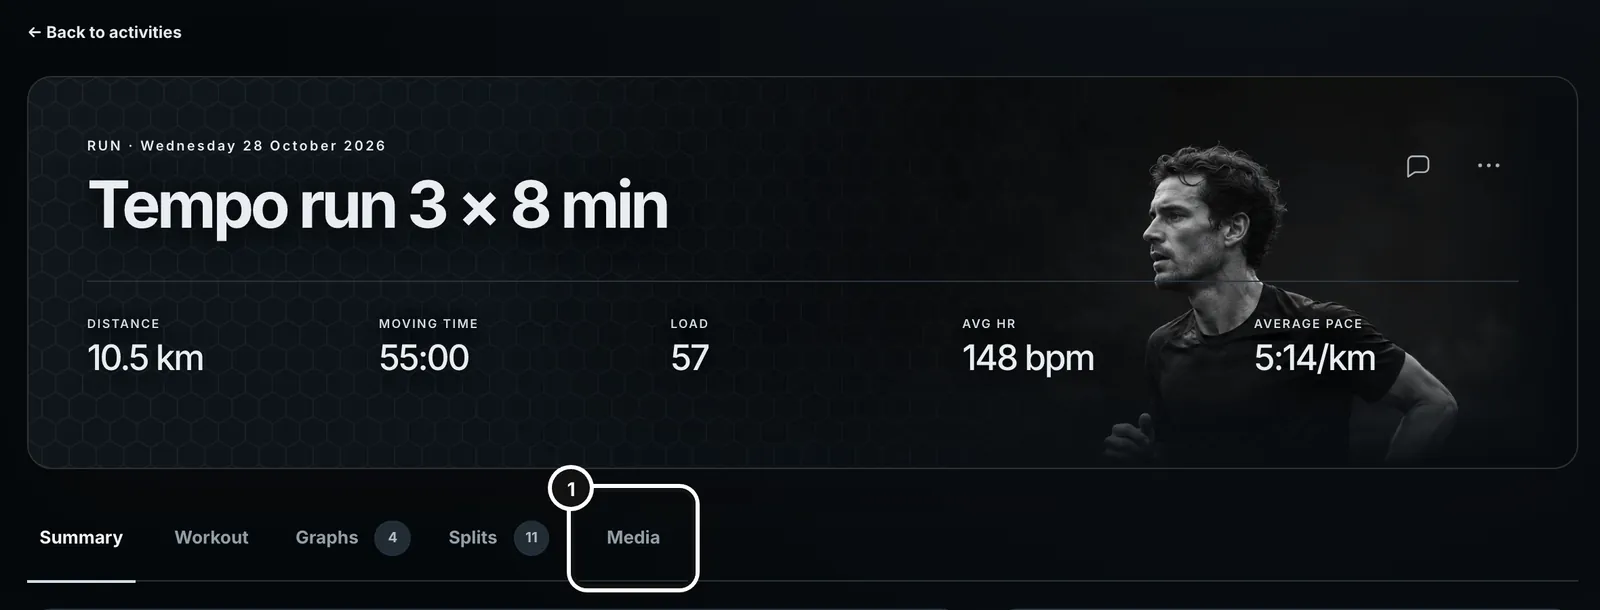
1Open the session and choose the Media tab.
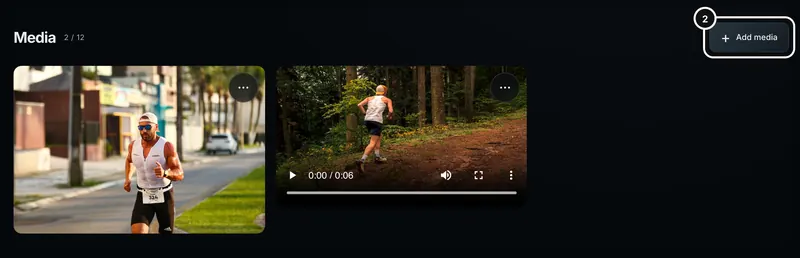
2Press Add media and choose photos or videos from your computer or phone.
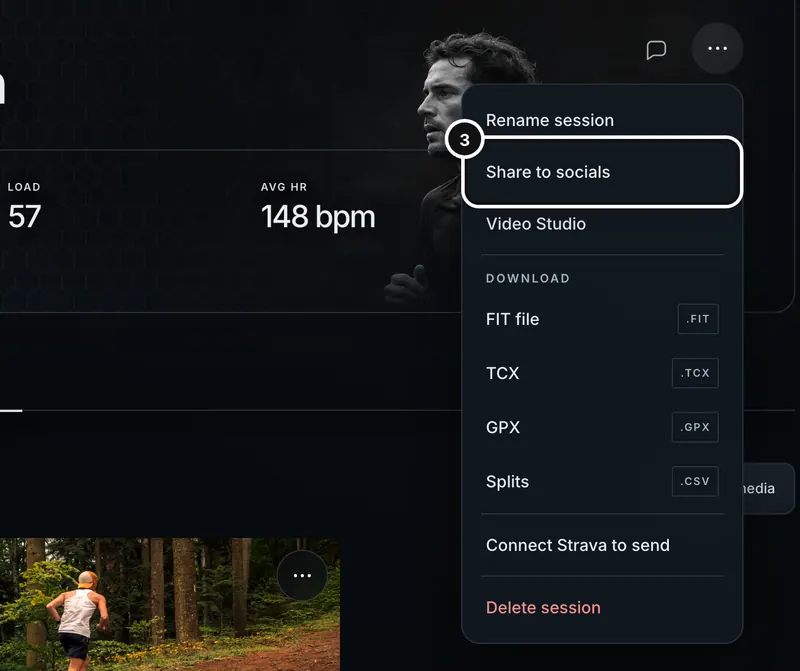
3Open the three-dot Session actions menu and press Share to socials. It is only there once the session has a photo or video.
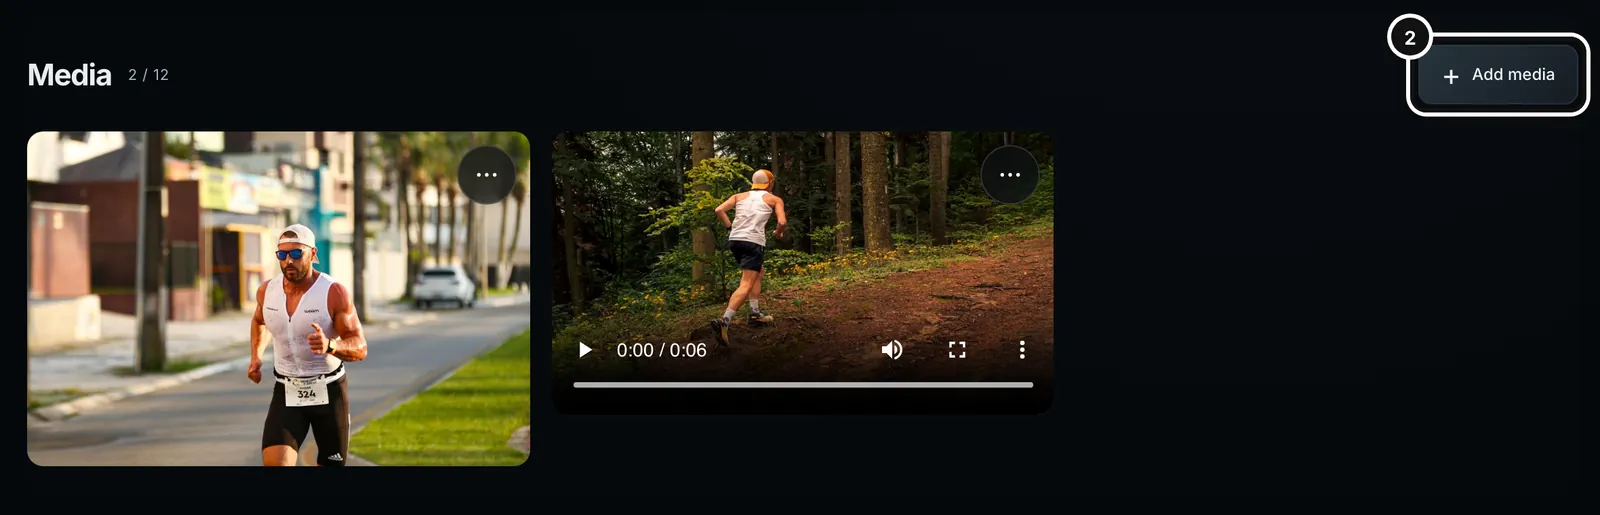
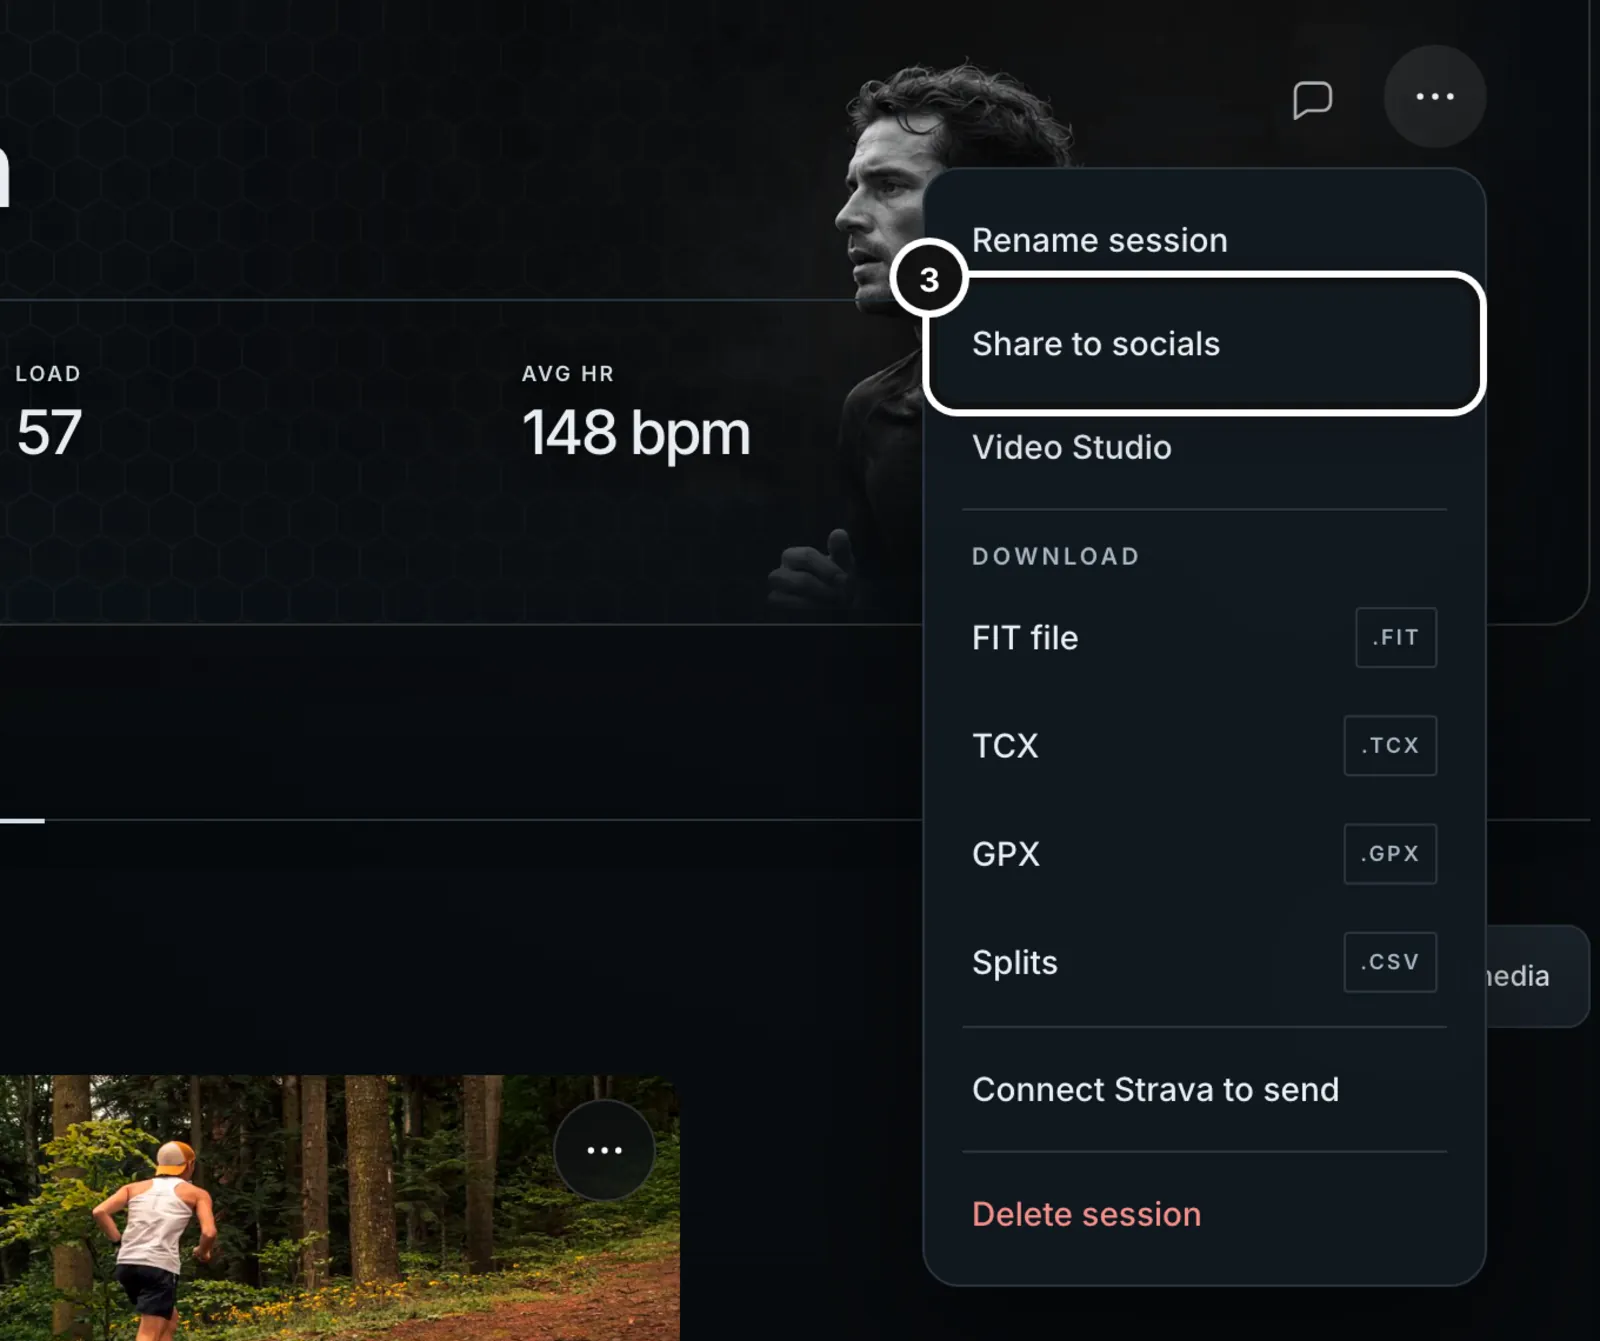
Add photos and videos
- Open the session and choose the Media tab.
- Press Add media, or click the empty area on a session with no media yet, and choose one or more files.
- Form uploads them and shows them in the gallery with how many the session holds, such as 2 / 12.
- A session holds up to 12 photos and videos, 100 MB in total.
- Photos can be JPEG, PNG or WebP, up to 10 MB each. Videos can be MP4, MOV or WebM, up to 25 MB each.
- A file that is too big, empty or over the limit is named with the reason, and the rest still upload. Retry uploads tries the failed ones again.
- Each item’s … button has Share to socials, Download (the original file) and Remove.
- Your media is private to you. Friends don’t see it in the feed.
Make a post
- Press Share to socials in the Session actions menu, or in a photo’s or video’s … menu.
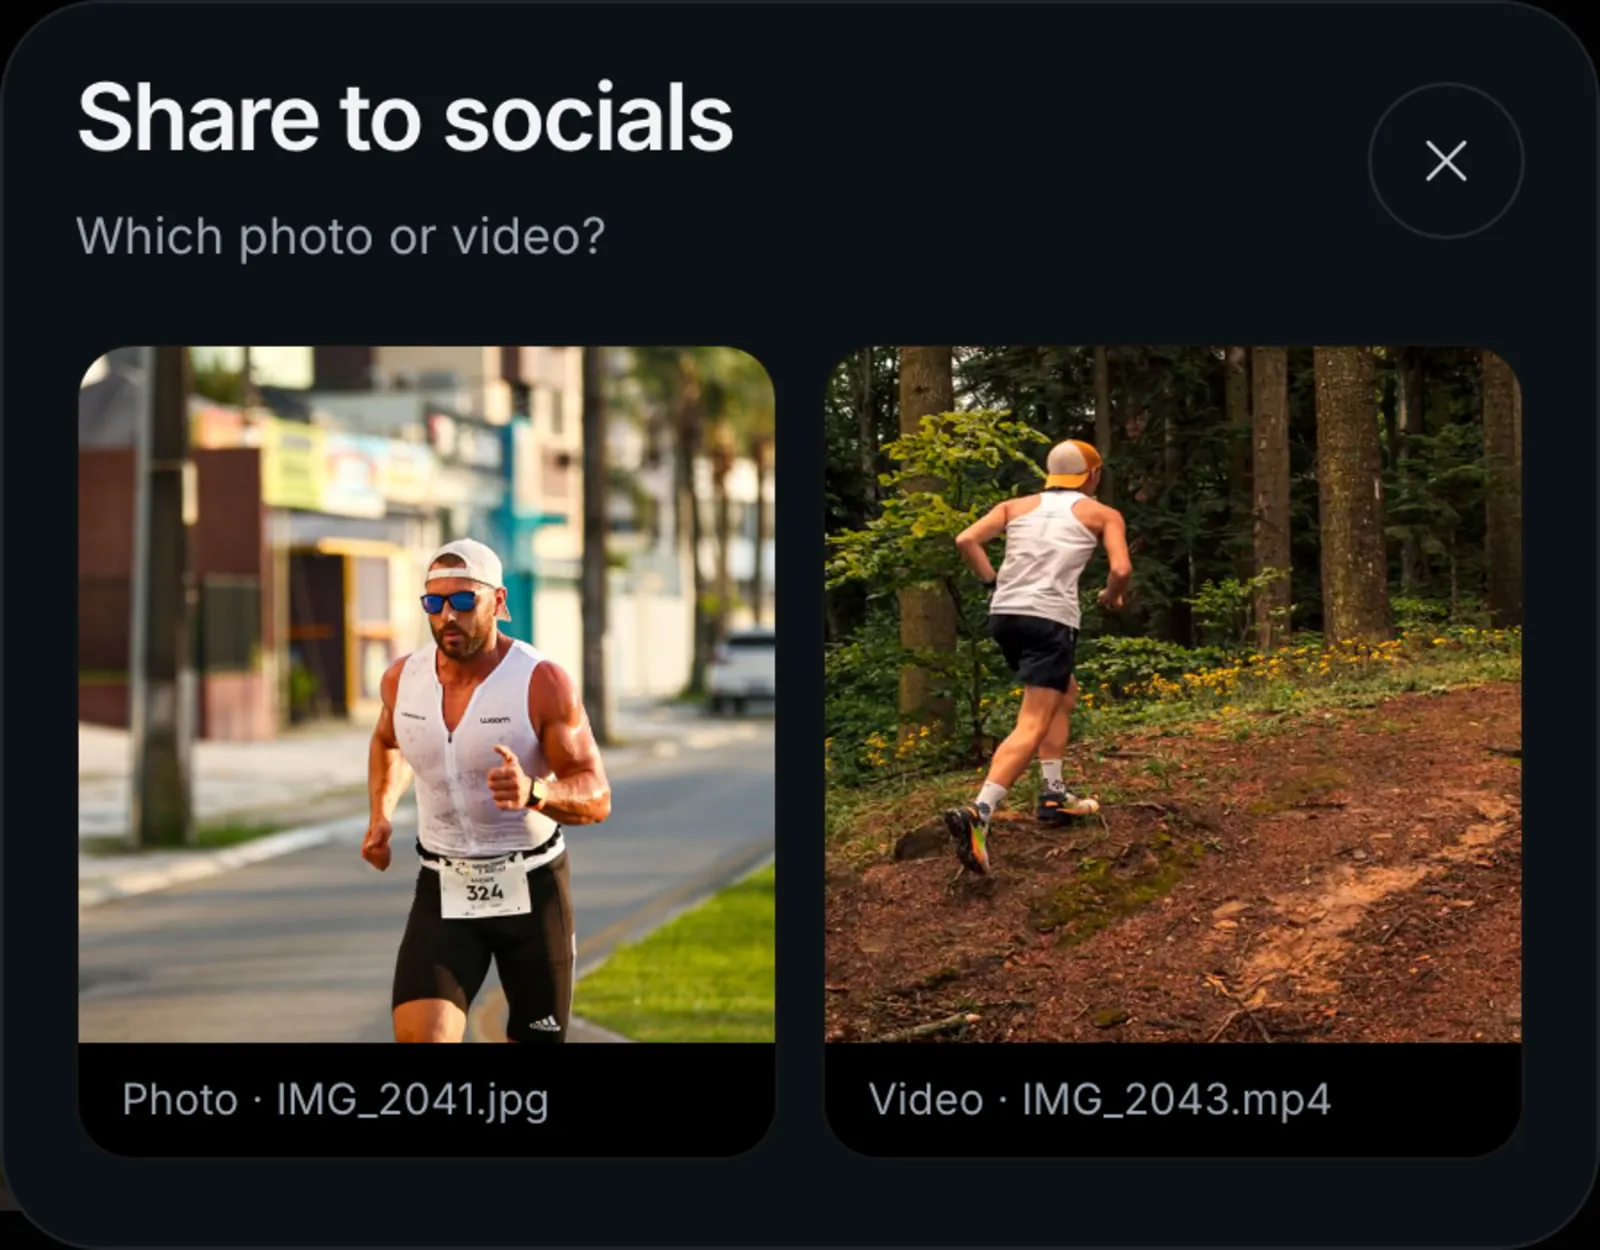
- If the session has more than one item, choose which: “Which photo or video?”
- The Share workout sheet opens with a preview of your post.
- Choose a Format, choose what to show, then press Download image (Download video for a video).
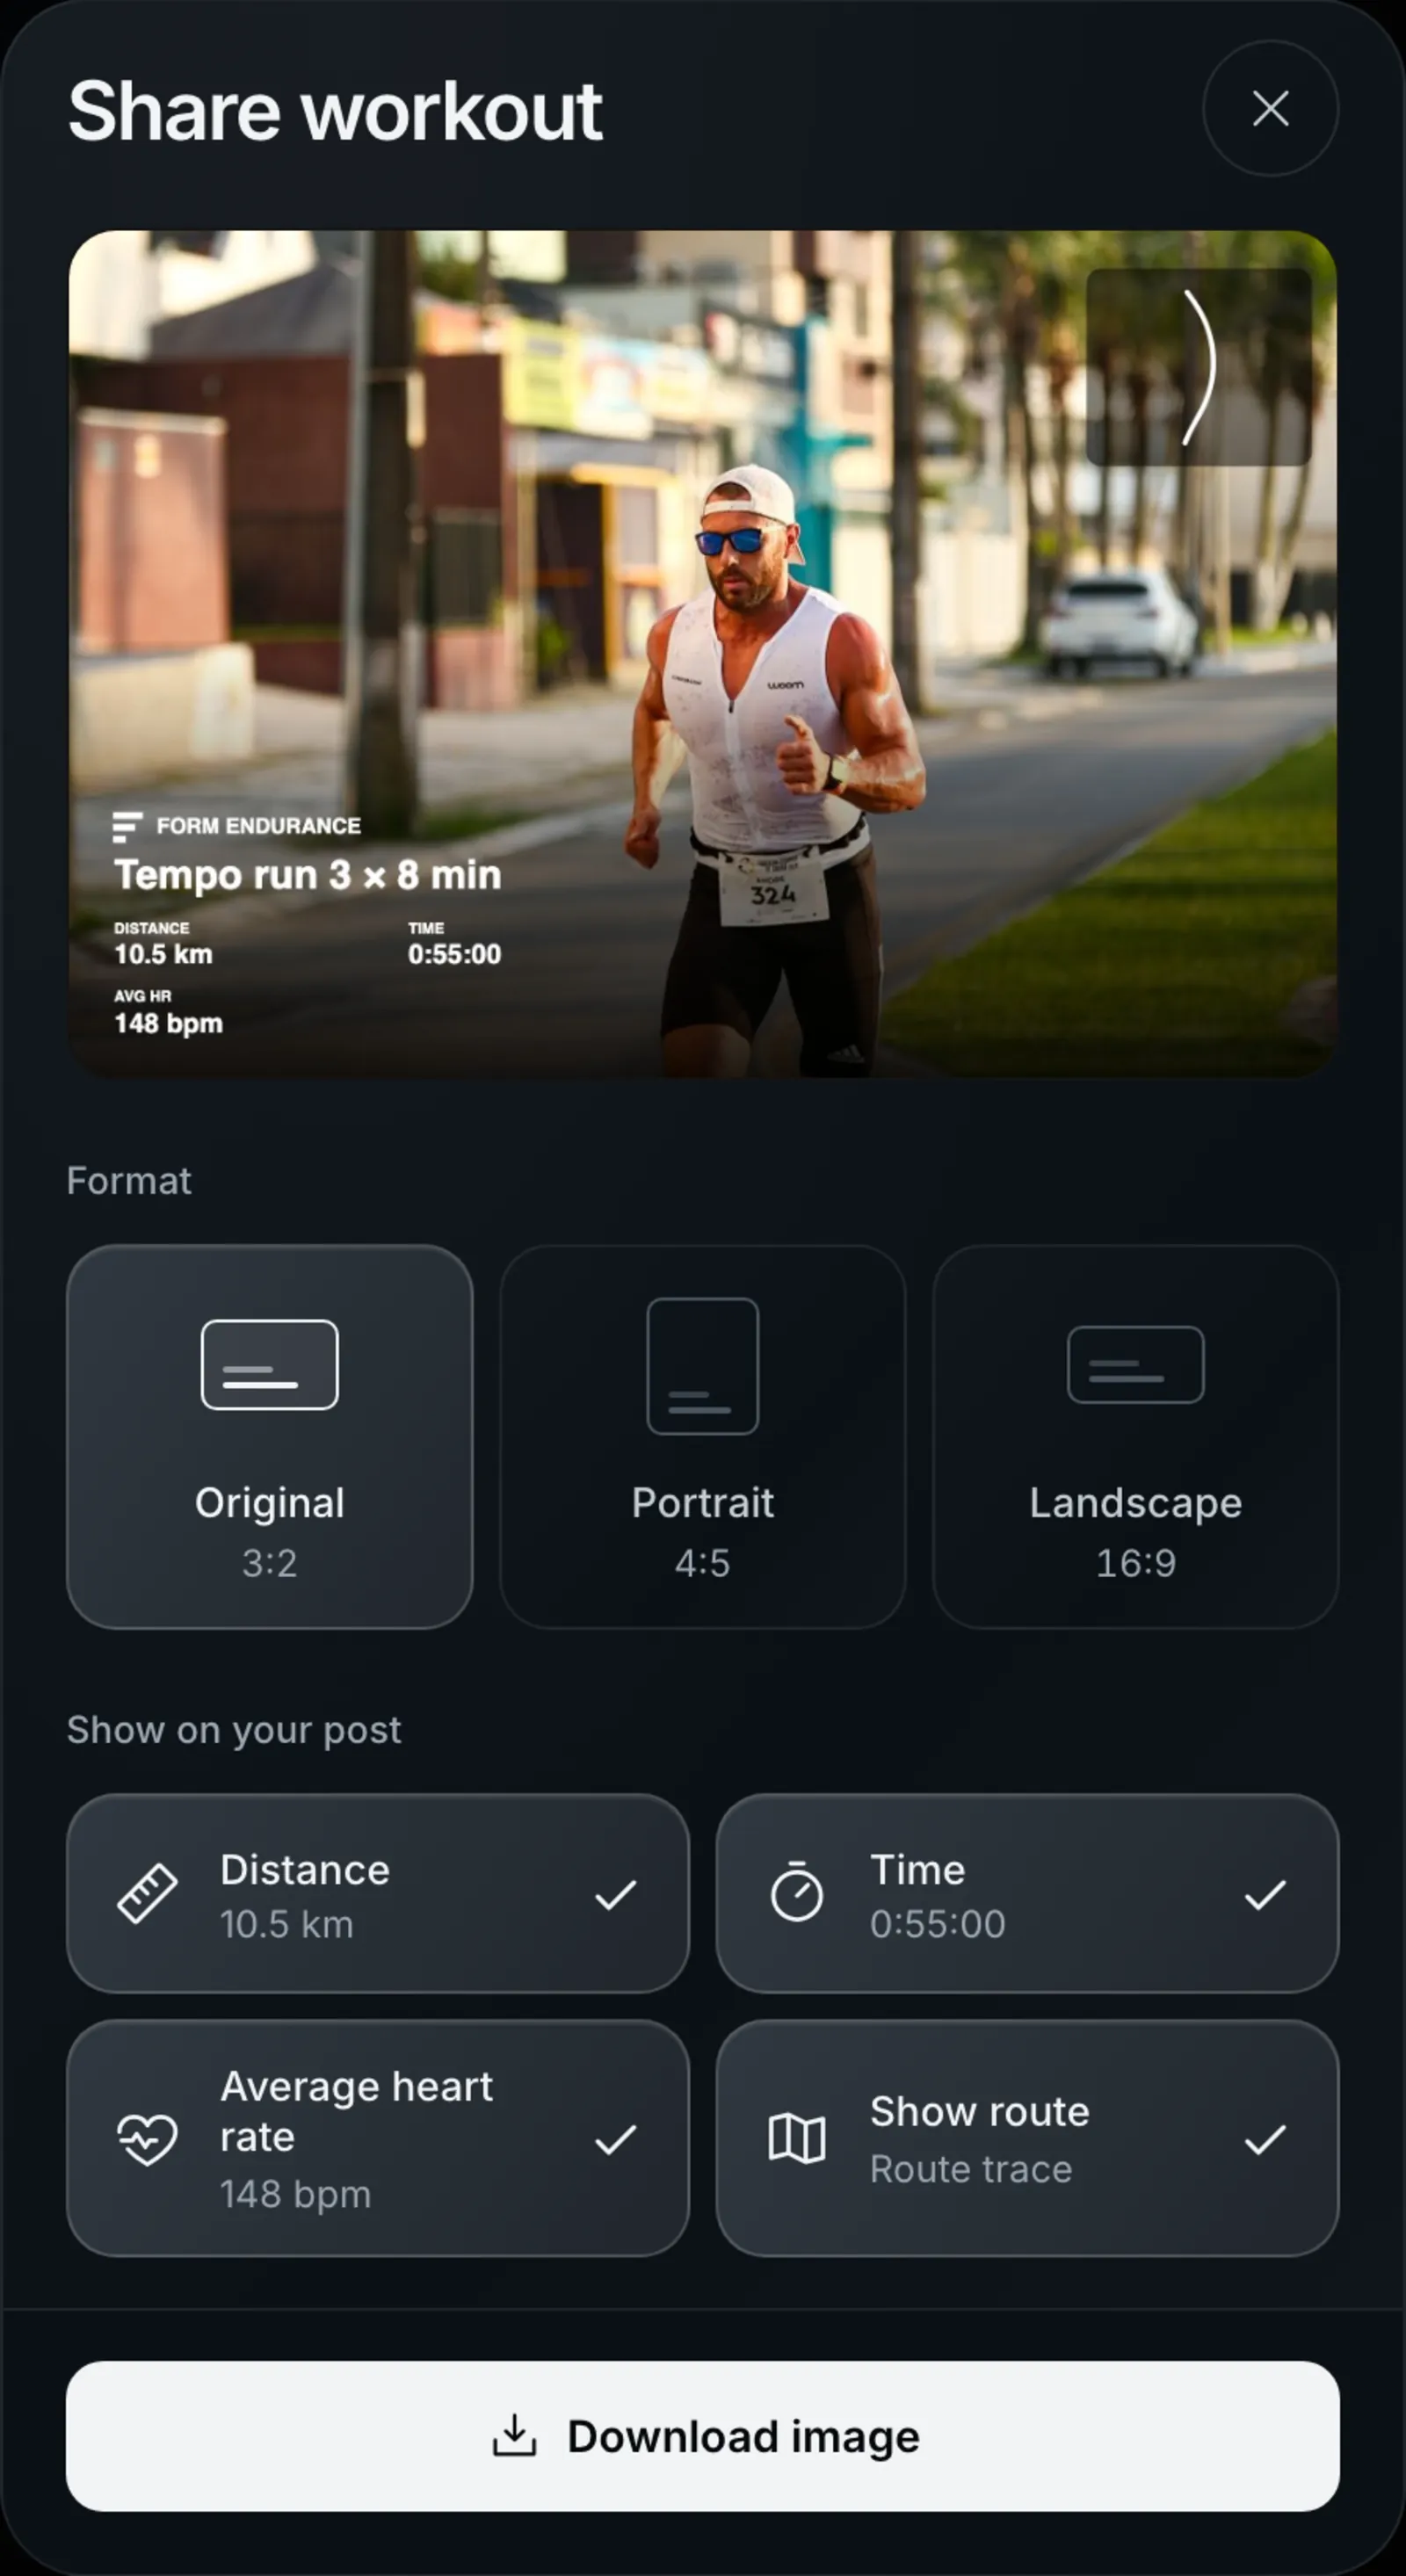
- Format: Original keeps your photo’s own shape and shows its ratio. Portrait 4:5 suits a feed post and Landscape 16:9 a wide one.
- Show on your post: Distance, Time, Average heart rate and, on a ride with a power meter, Weighted power. Press one to take it off; the preview changes straight away.
- Show route adds the session’s route trace in the top corner. On a video, a dot moves along the route as the video plays.
- The Form Endurance mark and the session’s name are always on the post.
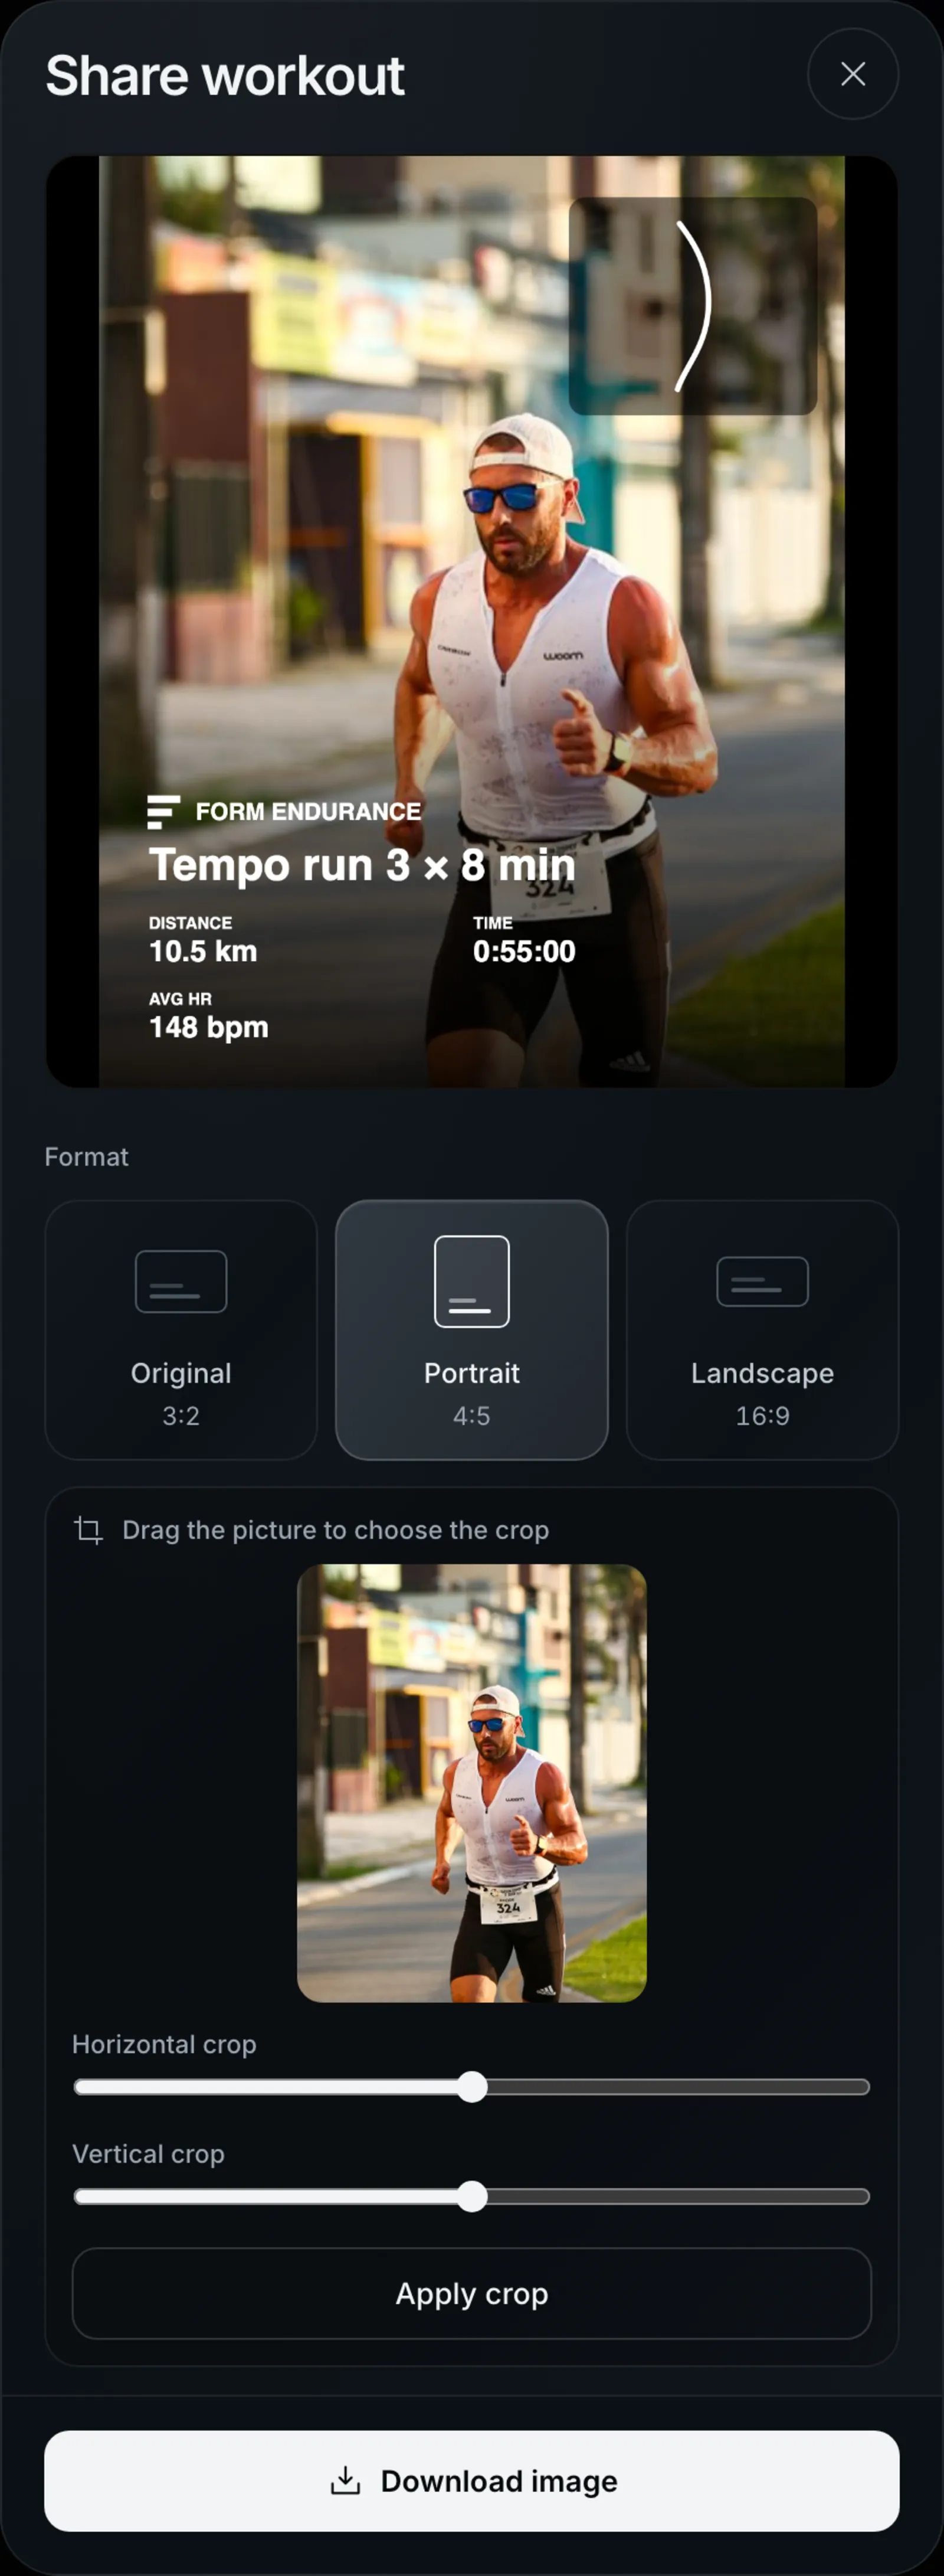
When you choose Portrait or Landscape, a crop panel opens. Drag the picture to choose the crop, or use Horizontal crop and Vertical crop, then press Apply crop.
Videos
A video post keeps your whole clip and its sound, with the overlay on every frame. Form builds it in your browser, so nothing leaves your device until you share it. The sheet shows “Preparing video…” with a percentage while it works; a long clip takes a while, so keep the page open. If your browser can’t keep the video’s sound, Form says so and suggests trying another browser or device.
Download or share
- Download image or Download video saves the finished post. Post it from your phone’s or computer’s own apps.
- On a phone or a browser that can share files, a Share button sits beside it and opens your device’s share menu, so you can send it straight to an app such as Instagram or WhatsApp.
In the Form app
A session’s Media tab in the Form app works the same way: add photos and videos, and tap a photo to make a post. On the phone you can drag the overlay to move it, pinch to resize it and twist to rotate it, and Reset puts it back. Share to socials in the session’s actions shares a photo or video as it is, without the overlay.
Video Studio: your footage with your data
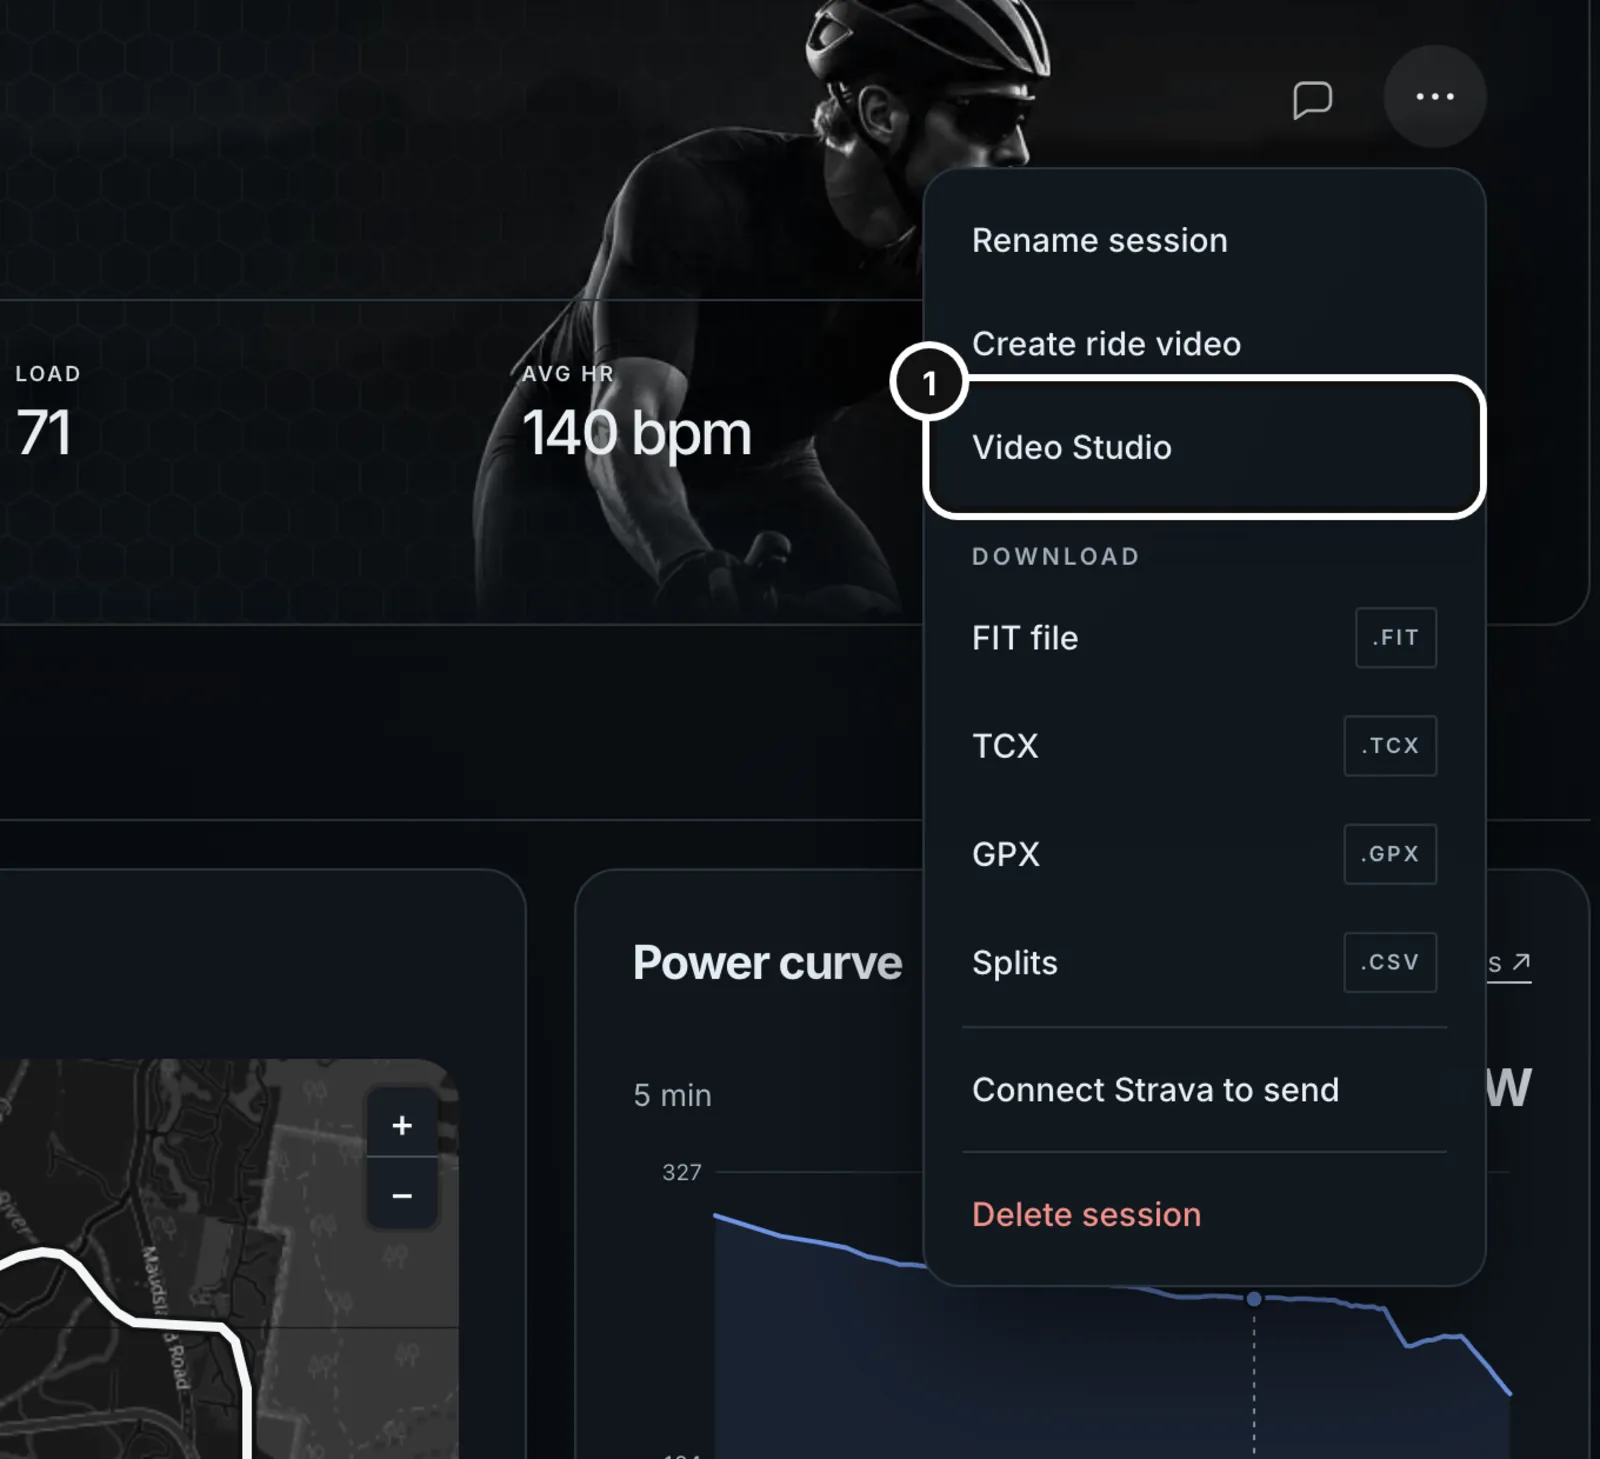
Video Studio cuts your own camera recordings from a ride or run into one video, with your speed, power, heart rate, cadence, elevation and route drawn over it from the session’s file. It is in the Session actions menu of every ride and run: recorded on your phone or uploaded, from Garmin or Intervals.icu, or ridden on the Form trainer.
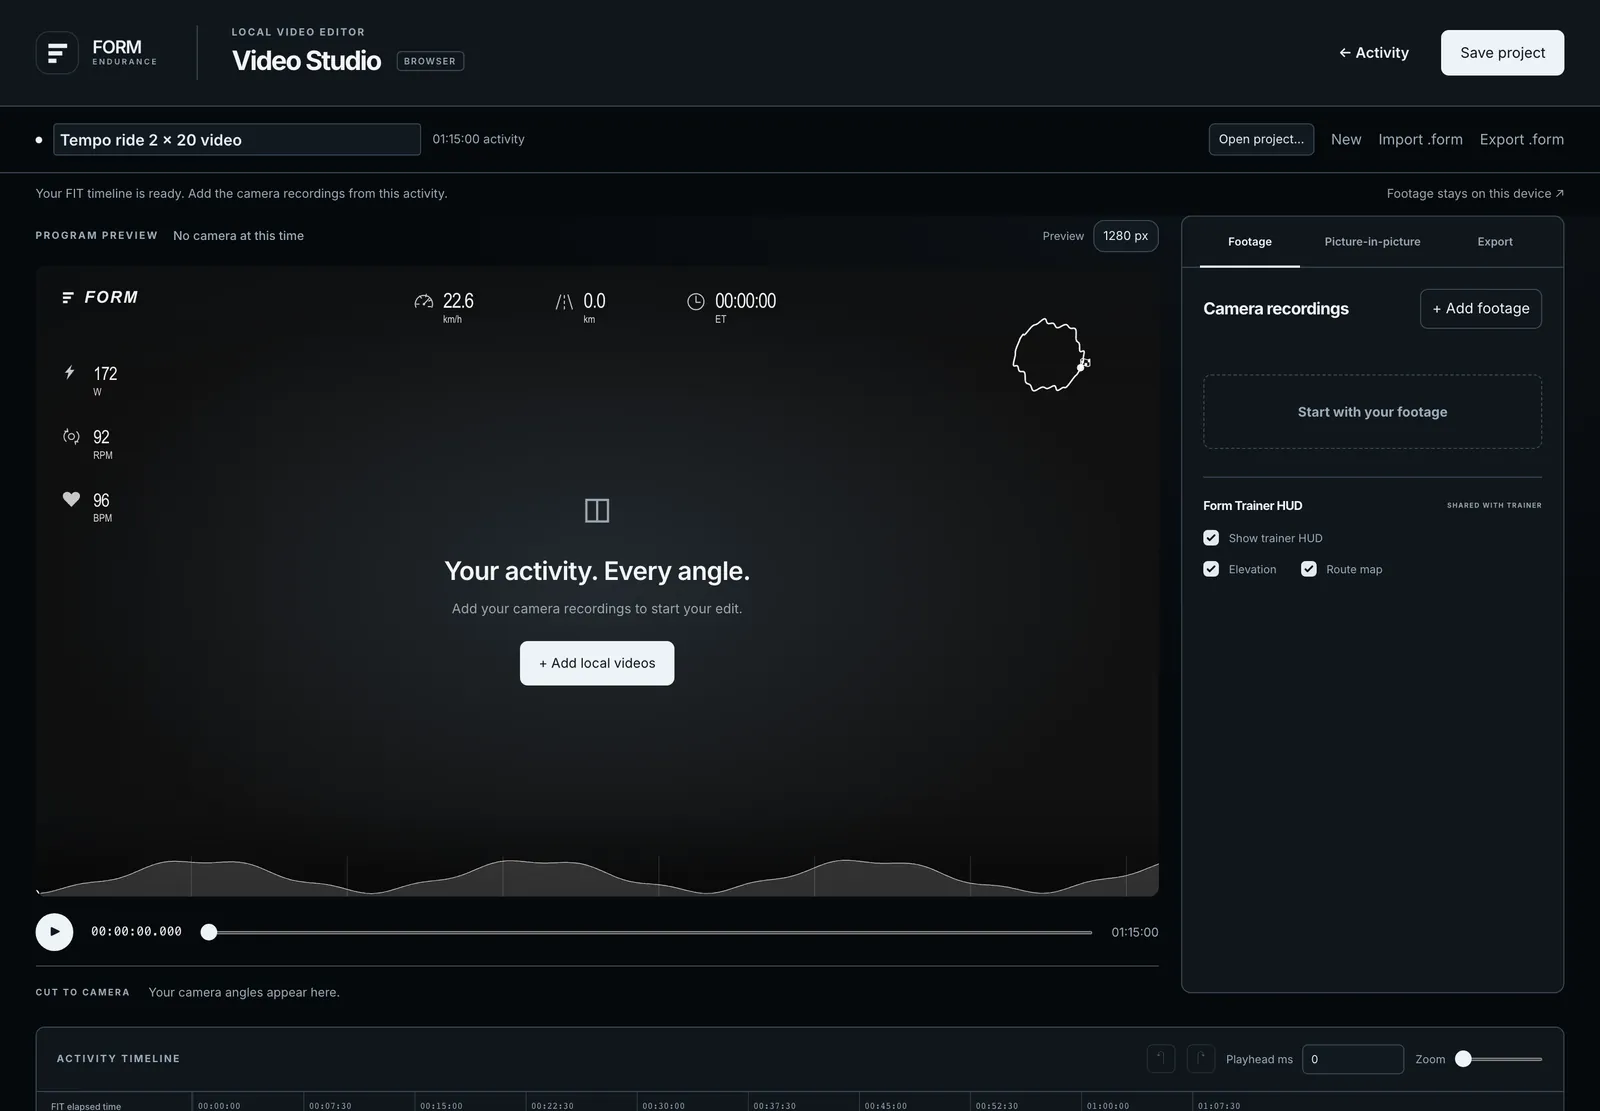
- Open Video Studio from the ride’s or run’s Session actions menu. Form loads the session’s original file as the timeline.
- On the Footage tab, press Start with your footage and choose the videos from your cameras. They stay on your device; Form never uploads them.
- Form lines each clip up with your session from the time it was recorded. If a camera’s clock was wrong, set Clock correction (ms) under Camera clock & metadata, or drag the clip along the timeline.
- Under Cut to camera, choose which camera shows when. Picture-in-picture adds a second camera in a corner for a stretch you choose.
- Choose what the overlay shows: Show trainer HUD, Elevation and Route map. The overlay is the same one the trainer uses.
- On the Export tab, choose the resolution and frame rate (720p 30 fps up to 4K 60 fps) and Landscape 16:9 or Portrait 9:16, and export. The video is rendered on your device, so keep this tab open until it finishes, then Download video or Share / Save video.
- Save project keeps your edit (cuts, timings, layout) in Form, and Open project… brings it back. The video files themselves stay on your device; if one is missing, Form asks you to choose it again.
- Export .form saves the edit as a file and Import .form opens one, so you can move it to another computer.
- Audio follows the camera cuts. With Skip sections without footage on, the parts no camera covered are left out.
- If Form can’t get the session’s file, for example a Garmin session whose file hasn’t arrived yet, Video Studio says “Unable to open this activity” and asks you to check that the file is available.
Create ride video
Rides also have Create ride video in the Session actions menu: a quicker way to put Form’s ride display on one clip. Load the ride, add your footage, line up the ride time with the start of the video, and export one of three things: Video + HUD (your clip with the display on it), a Transparent HUD (the display alone with a transparent background, for your own video editor) or a Green-screen HUD. Your FIT file, footage and exports stay on your device.
Common questions
- Why is there no Share to socials in the menu?
- It appears once the session has at least one photo or video. Add one on the Media tab first.
- Can I share a video with sound?
- Yes. A video post keeps the clip’s own sound, as long as your browser can export it. If it can’t, Form says so.
- Does Form post to Instagram for me?
- No. Form makes the image or video. You download it, or use Share on a phone, and post it yourself.
- Do my friends see my photos?
- No. Session media is private to you. Friends see the feed card’s distance, time and pace or speed only.
- Are my videos uploaded to Video Studio?
- No. Video Studio and Create ride video work on the files on your device. Only your Video Studio project (the edit, not the footage) is saved to Form.